


Hey sweets,
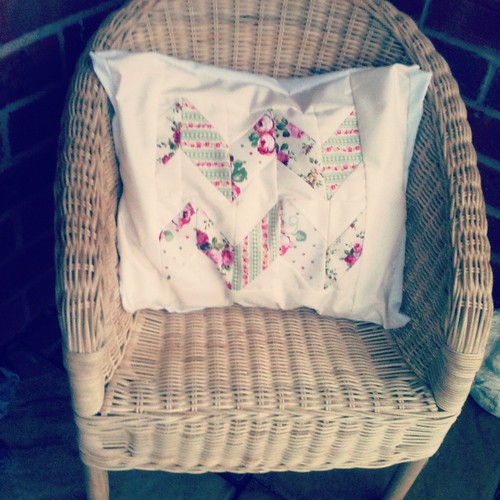
This weeks Sewing School we've been dabbling in a little bit of patchwork! Had no idea it would be so much fun, we may become quilting addicts, seriously enjoyable and the results are just soo cute! So here it is, step-by-step, our chevron scrap cushion!

You will need:
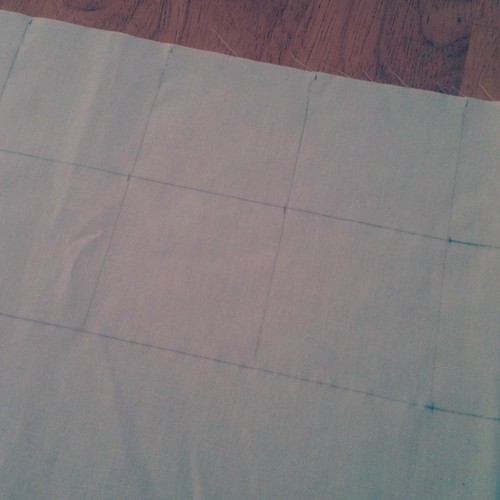
Several different patterned fabrics cut into 10 - 2.5"x5" rectangles
Plain cotton 20 cut into - 2.5" squares
Plus plain cotton amount dependent on your cushion size.
sewing basics - measuring tape, pins, scissors, thread, machine (though could easily be hand-sewn if you have the patience!)

Step 1: Mark out your squares. There is probably a more sophisticated way of doing this, but we're just teaching ourselves as we go along... Once marked up, cut your squares and rectangles out...

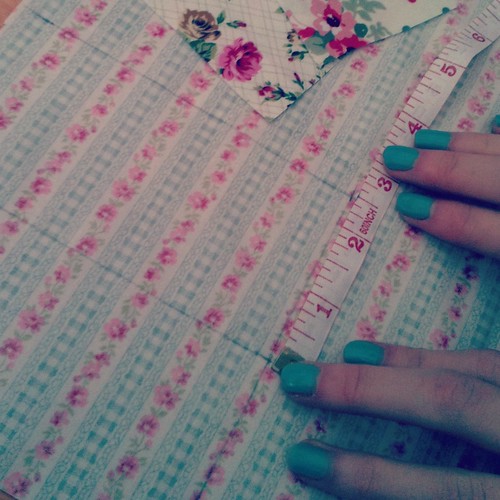
Step 2: Lay your fabrics out in the order you want them so that you know the order & direction of your stiches (the significance of this will make sense in a moment)...
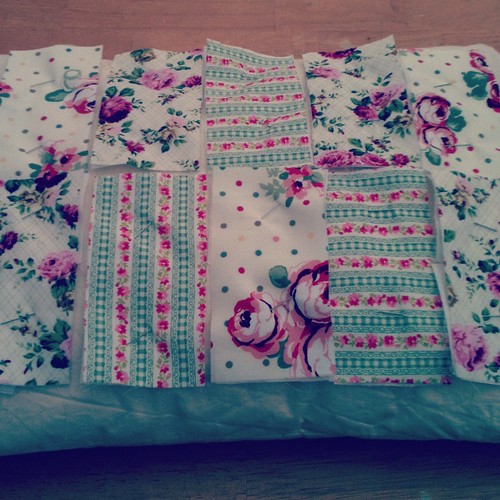
Step 3: Pin 2 squares to the front of your patterned rectangles. Repeat for all rectangles.

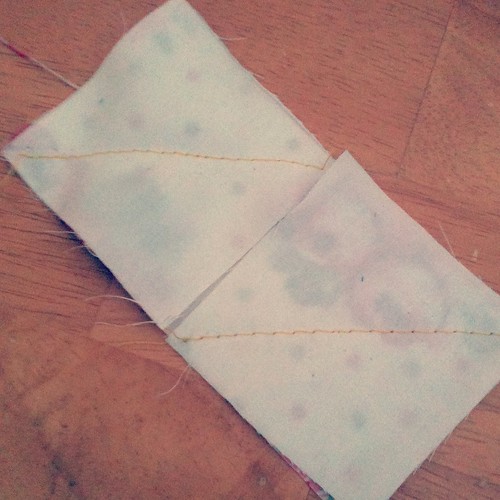
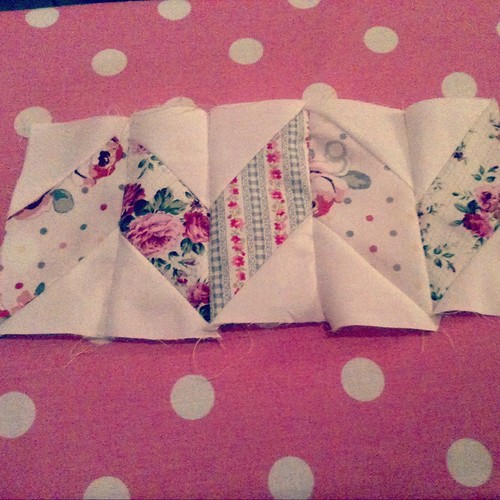
Step 4: Start sewing from corner to corner, in the same direction on each square (see pictures below)

See below - we used a yellow thread so that you can see the stitches. **Remember to alternate the direction of stitches to create the zig-zag effect.**

Step 5: Cut the corners of the pieces off just above the stitches.


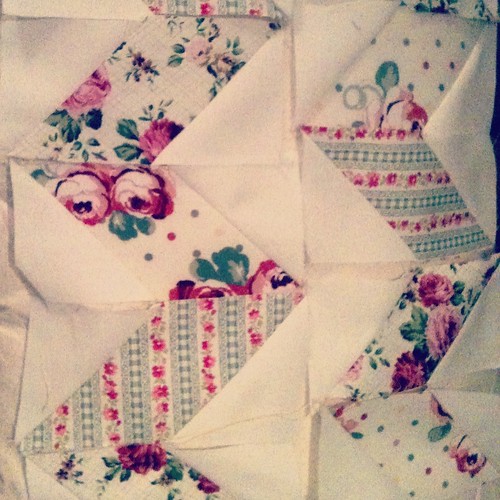
Step 6: Open out the rectangle and press the seams flat like this:

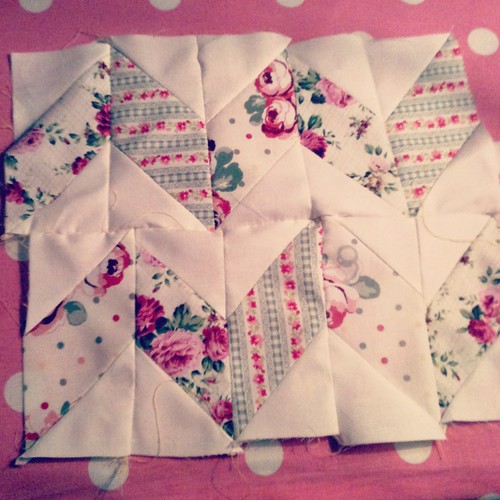
Step 7: Layout in your order again, ready to start piecing your patches together?
Step 8: Place the pieces face to face and stich straight along the edge (as close as you can!)

Keep going until you've attached your entire row like below and press the seams (pressing addicts, like things to look neat as we go along!)
Step 9: Repeat with the second row, then fix the top and bottom (again by sewing along the edge, face to face, don't forget to press after!)
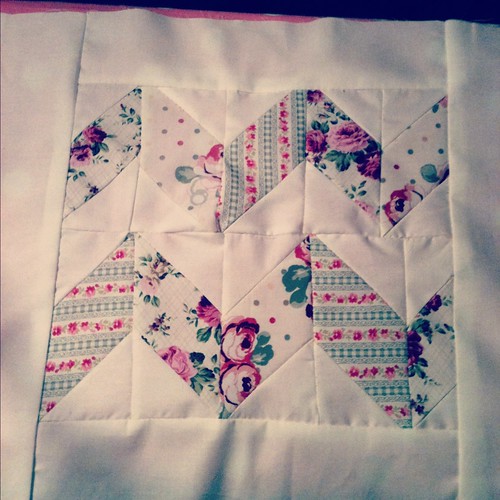
Step 10: Cut 2 strips of plain cotton the length of your panel (ours were 2.5" wide to fit on our cushion) - sew to the top and bottom.


Step 11: Repeat with cotton for the sides, cut to the height of your panel (again adjusting the width according to your cushion size.) and press (of course!)... So here is the panel, ours isn't perfect, but it sure is pretty!
Rather stupidly (blame our enthusiasm, we were so excited at how lovely it was looking we couldn't wait to finish!) we forgot to photograph the next steps so bare with us while we attempt to explain how to turn it into a simple envelope cushion.
Cut 2 panels for the back, to the size of your cushion panel and so that they will overlap, with a little extra for seam allowance. Hem the edges that will form the overlap. then pin to the panel, face to face and sew all round the edges, flip inside out - et Voilá - One super cute patchwork cushion!
Much love,
R&L
xx


1 comment:
I like this. It sure takes me back when my grandma and I would have sewing lessons. We crochet a Grandma blanket once! Your end work is beautiful and I might have to try this soon too!
Mary from ♥ meowwzie.blogspot.com ♥
Post a Comment